

 I made the 'Give Thanks' sign using the same canvas that I used here and here and here. I just added metal 'stencil' letters that I picked up from Michael's in the summer. I actually purchased an entire alphabet of letters when they were on sale (normally $1 each). I also picked up a couple duplicate letters that have special family meaning, so I was also able to make this Thanksgiving version too with the help of one extra 'G':

I painted this turkey onto burlap, we'll call him Tom. Tom the Turkey, I like that. It's not perfectly centered on the picture it's wrapped around. I have an order into Bill for a simple wood frame that I can staple the turkey burlap to for next year, and when we staple it, we'll get it closer to center! Painting a big turkey was a pretty straight forward project, but I've included a little tutorial at the bottom of this post in case you want to duplicate Tom for next year:)!

I cut these letters out of felt using a computer template. I cut out two pieces of felt for each letter, and then Lucky and Charm helped me sew the pieces together. The added weight of two felt pieces made the letters hang better.

I picked up these stick pumpkins on sale from Target last year. They were in the $1 bin area, but were really $2.50 each originally.
In addition to Tom, we also made hand print turkeys this year:

We ate fruit turkeys too:

We also made clay turkeys:


And we read some wonderful Thanksgiving Books:

Finally, we completed our Thankful Board:

We really had fun completing our Thankful Board. It's amazing how a few simple words can capture so much about our lives this month! It will be fun to read this list in years to come.
And on Thanksgiving Day, we managed to get a decent family picture:)!

And with that, Adios November...bring on Christmas!!
Tom the Turkey Tutorial

Find a clip art turkey profile that you like. Print it out on computer paper and make some measurements to determine how big you want your final turkey to be. I ended up taking my computer picture to Fed Ex Kinko's and had them blow it up to 3.5x the original size.
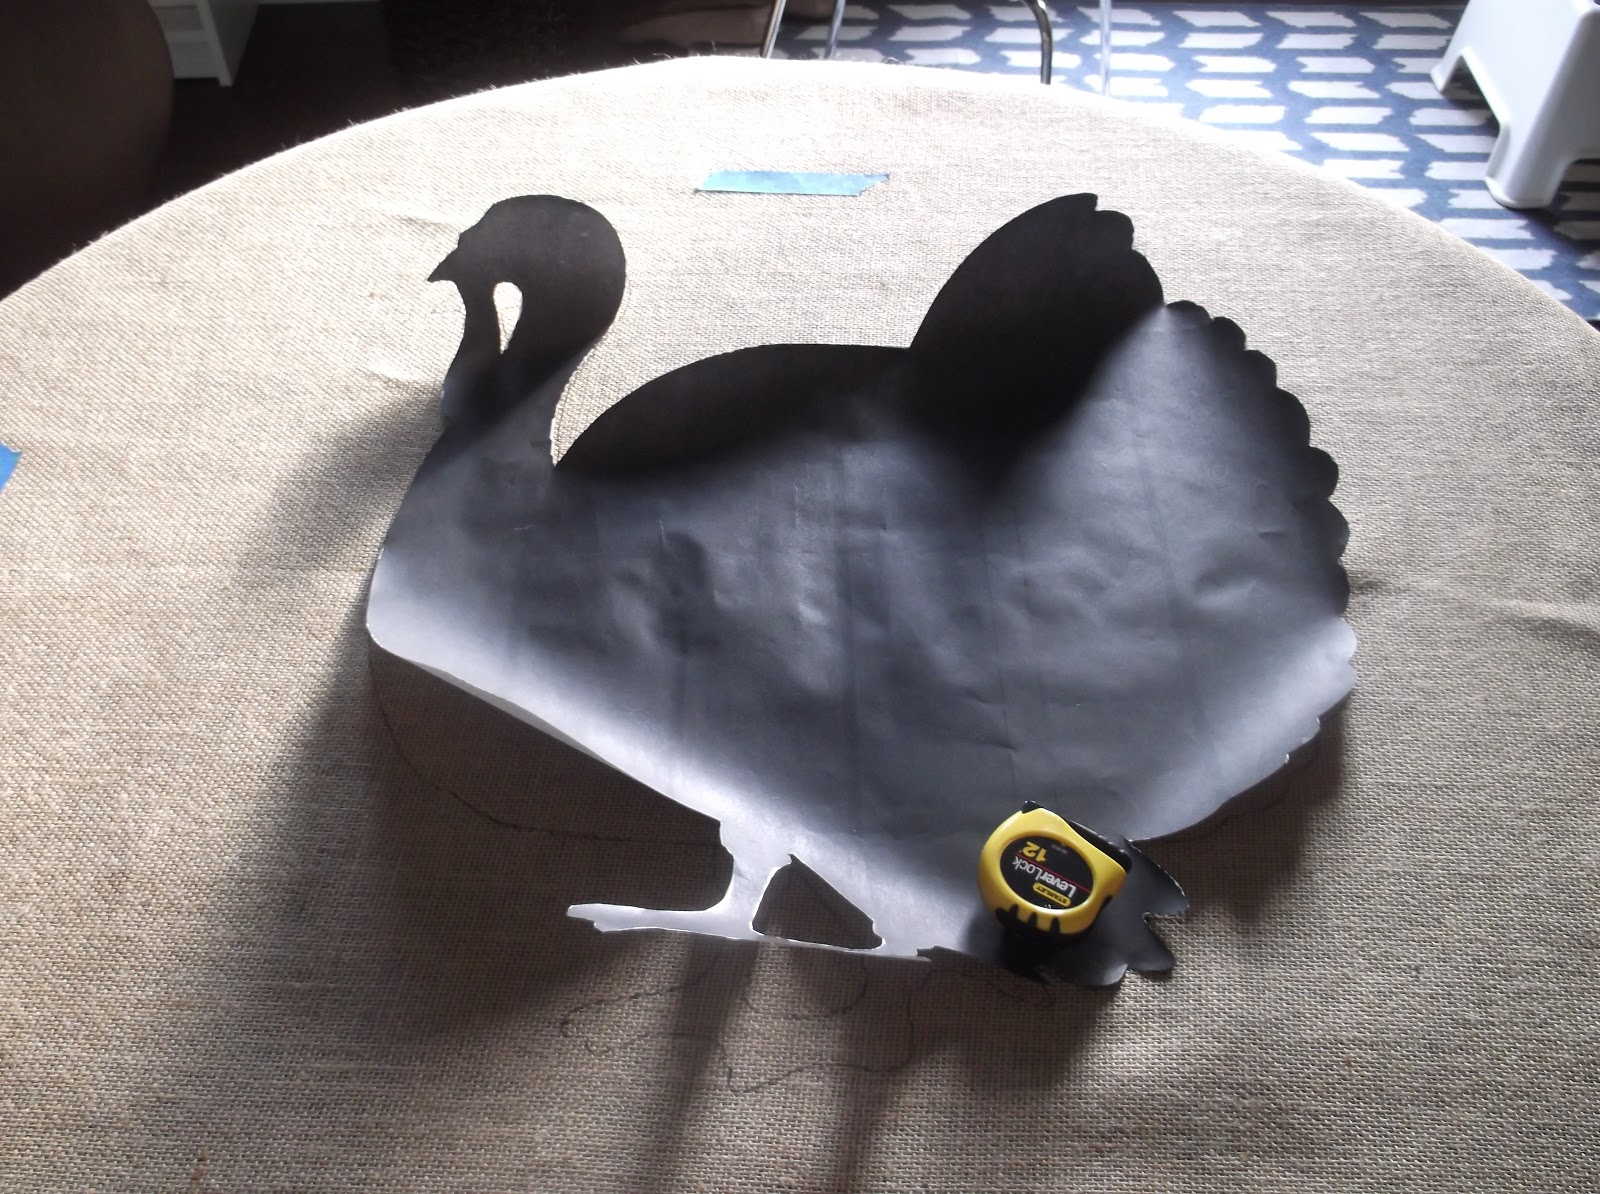
Cut out your turkey and center it on your fabric.

Grab a marker (really any marker would do...I just happened to have a fabric marker).

Trace your turkey.

Grab some paint. If you decide to paint on burlap, you'll need tons of paint to make it look opaque. I wanted the natural look of burlap, so that's why I used it, but I probably would use a tan/beige duck cloth if I had to do it again.

Paint. A lot. I think it took 4 coats of thick paint to cover the turkey as well as I wanted.

Tape/Staple/Glue your fabric turkey around a frame or canvas of some sort. Stand back and Gobble.
Have a great weekend!
No comments:
Post a Comment